SETUP GUIDE
Get Started in 5 Minutes
Create a Cloudflare account and connect it to theXEO. ~5 min with Cloudflare · ~20 min first time setup
Having trouble? We'll set it up for you.
Never send your password. We'll set it up together over a screen share on KakaoTalk, or just guide you to the values you need.
Cloudflare handles 20%+ of all internet traffic. It's a publicly traded company (NET) used by Shopify, Discord, and more. The free plan is all you need.
Learn more
SOC 2 Type II, ISO 27001 certified. 310+ data centers worldwide. theXEO uses Cloudflare Edge Workers to optimize SEO without changing your code. Fail-safe: any error passes through to your origin unchanged.
Sign Up & Add Domain
Create a Cloudflare account and register your domain.
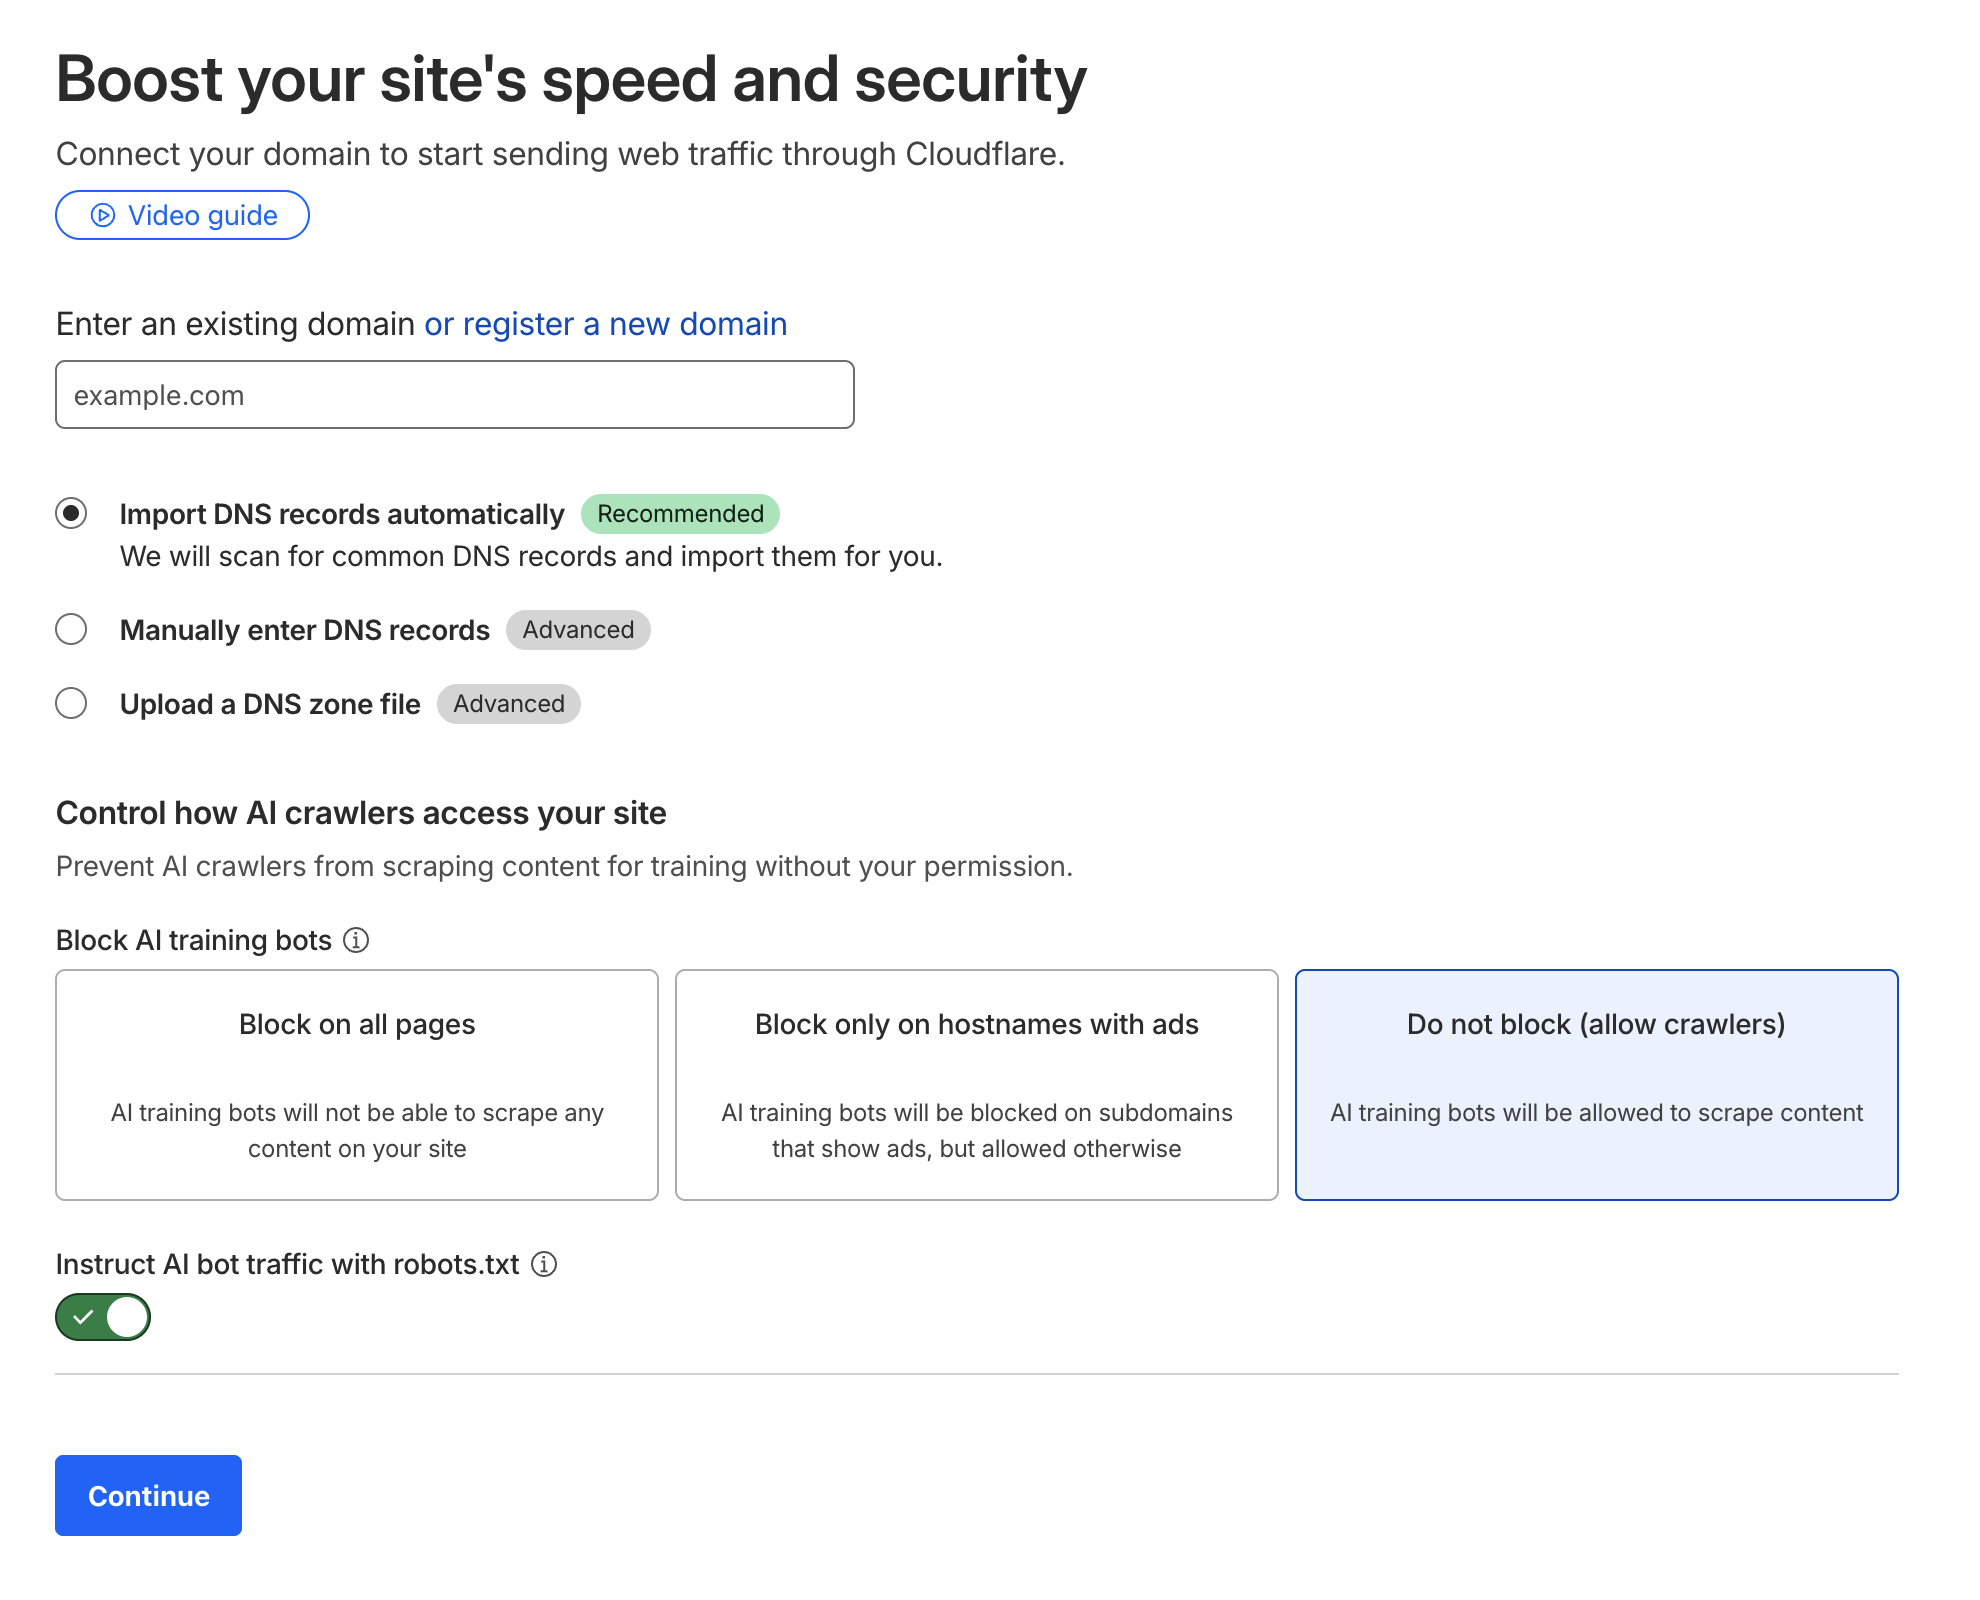
- 1 Sign up at dash.cloudflare.com/sign-up with email + password
- 2 Verify your email → log into the dashboard
- 3 Click "Add a site" → enter your domain (e.g. mysite.com) → Continue
- 4 Select Free plan → Continue
- 5 Cloudflare auto-scans your DNS records. When the list appears, click Continue
- 6 The next screen shows 2 nameservers → write these down (needed in the next step)
Change Nameservers
Update nameservers at the site where you bought your domain. Not sure where? Check your purchase history.
- 1 Log into where you bought your domain (GoDaddy, Namecheap, etc.)
- 2 Find Domain Management → Nameserver Settings
- 3 Remove existing nameservers and enter the 2 Cloudflare nameservers from step 1 → Save
- 4 Go back to Cloudflare dashboard → click "Check nameservers"
- 5 Usually takes 10min–1hr. You'll get an email when it's done
Copy Account ID
Copy the Account ID that theXEO needs to connect.
- 1 Log into the Cloudflare dashboard → go to Account Home
- 2 On the site-list screen, click "Copy account ID" (or open Workers & Pages → it shows under Account details on the right)
- 3 Surest way: your address bar reads dash.cloudflare.com/(32 chars) — that 32-character string is your Account ID
Create API Token
Create a token that lets theXEO deploy the Worker. This spans a few screens — take it slow.
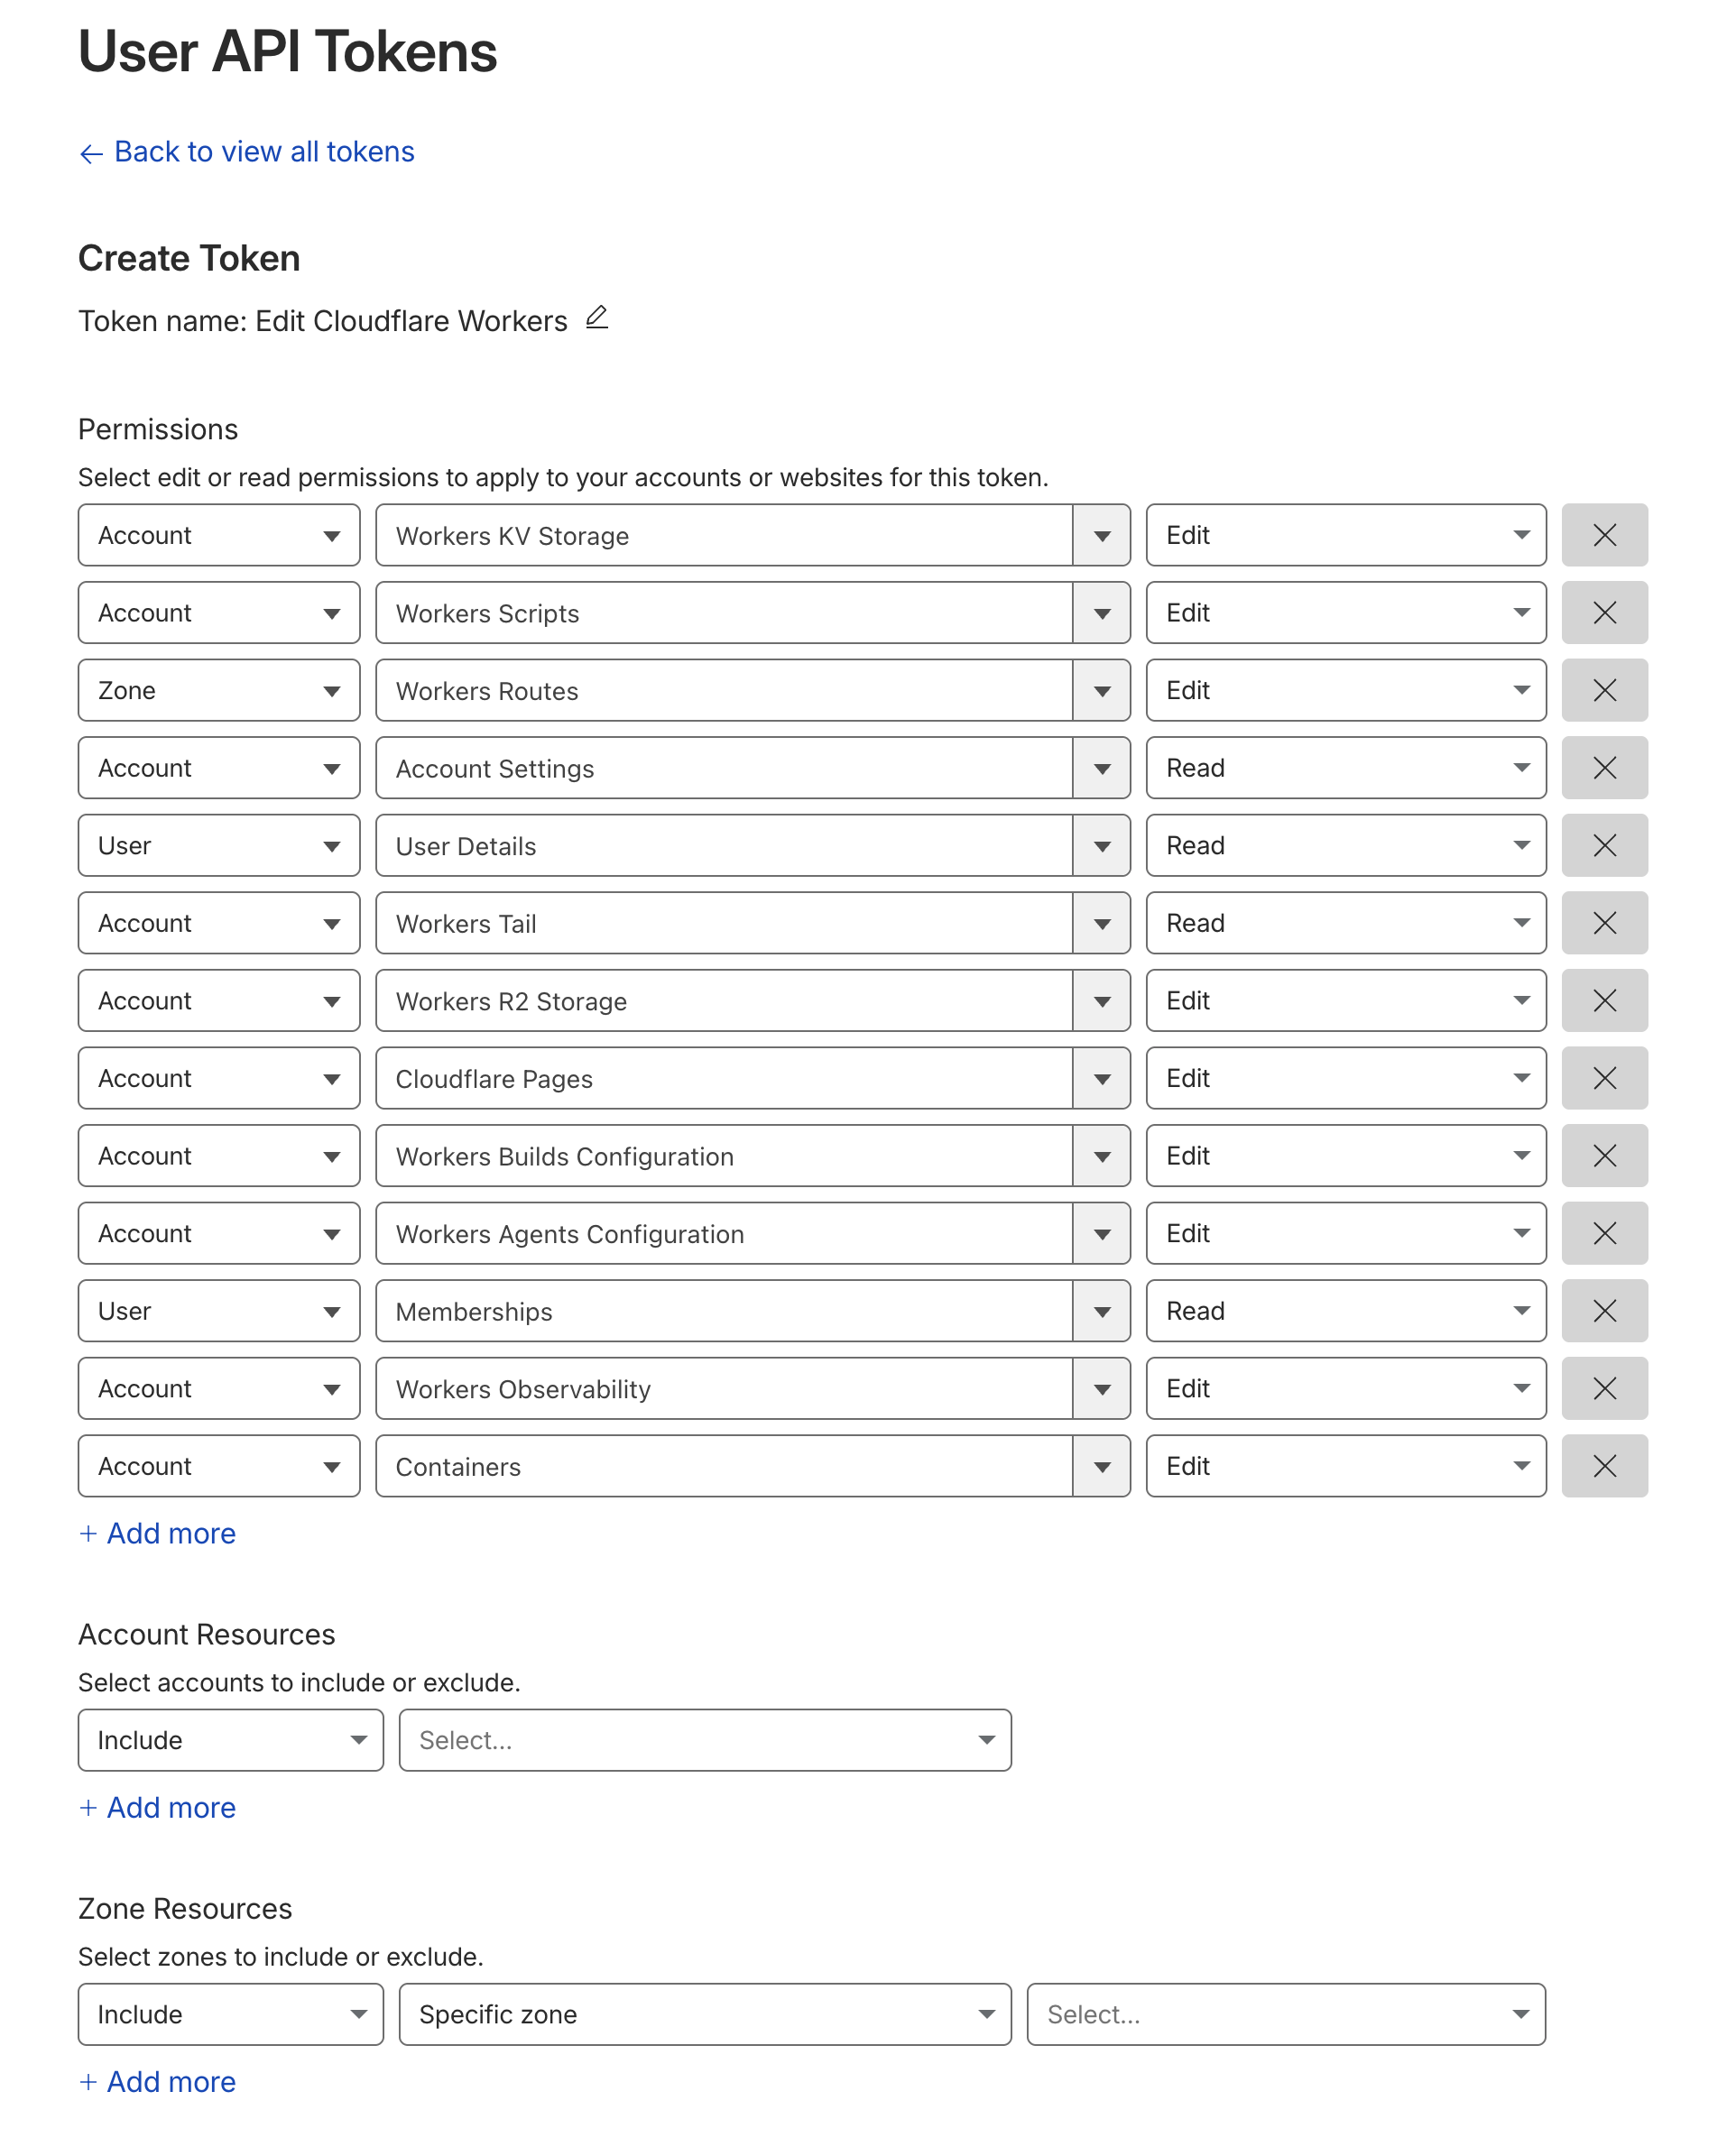
- 1 Open dash.cloudflare.com/profile/api-tokens → Create Token
- 2 Click "Use template" on the "Edit Cloudflare Workers" row
- 3 Leave the settings as-is → Continue to summary → Create Token
- 4 Copy the token immediately and save it somewhere safe
Connect Site to theXEO
Enter the 3 values you prepared and you're done.
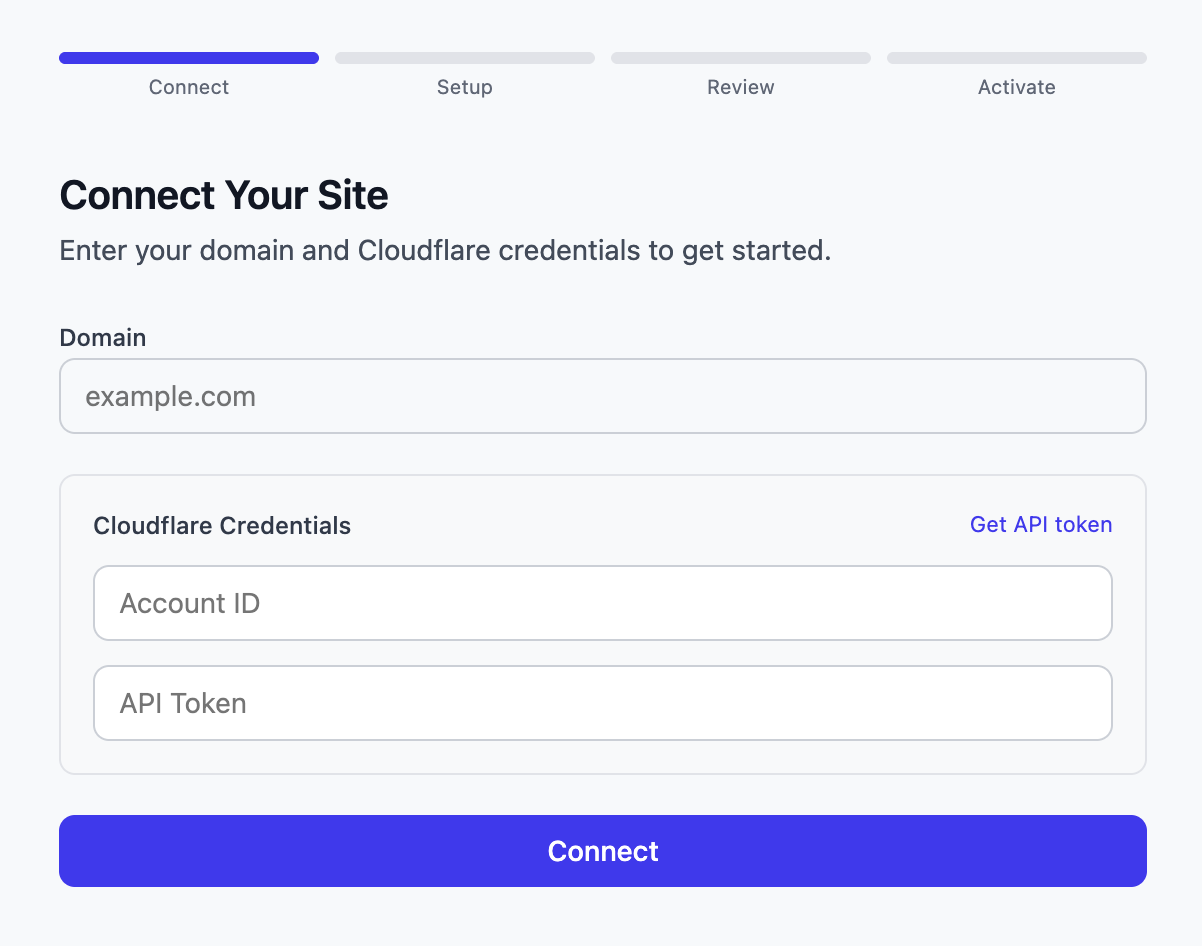
- 1 Log in to app.the-xeo.com → Add site
- 2 Domain: the domain you added to Cloudflare (e.g. mysite.com)
- 3 Account ID: paste the Account ID you copied earlier
- 4 API Token: paste the token you copied earlier
- 5 Click Connect → setup starts automatically
Done! theXEO automatically deploys the Worker and starts optimizing your SEO.
FAQ
Will my server change?
No. Cloudflare only relays traffic. Your origin server and hosting remain the same.
Do I have to move my nameservers to Cloudflare?
No. If you already use another DNS provider and don't want to migrate, you can start with "Connect via DNS" (a single CNAME) in the theXEO dashboard instead. This guide covers the full move to Cloudflare.
Will changing nameservers break my email?
Cloudflare copies your existing DNS automatically, but a record can occasionally be missed. Before changing, confirm your MX and SPF (TXT) records are present in the Cloudflare DNS list and you're safe.
Is the API token safe?
It only has Worker/KV permissions — no access to domain settings or billing. Encrypted with AES-256-GCM. Revocable anytime.
How do I stop using theXEO?
Disconnect from the dashboard. The Worker is deleted and your site returns to its original state.
Having trouble? We'll set it up for you.
Never send your password. We'll set it up together over a screen share on KakaoTalk, or just guide you to the values you need.